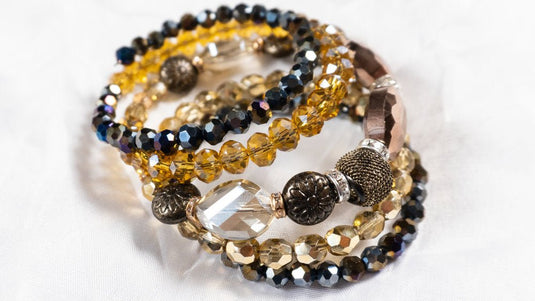
5 Strand Bracelet + Giveaway
A few weeks ago I made a multi-strand bracelet and everyone loved it. I got so many comments on it.

This multi-strand bracelet was quite time consuming, so this week I decided to play with the concept of an easier way to make a multi-strand bracelet.

Materials
Here's what you'll need to make this bracelet:
- 4mm Glass Pearls – approximately 47 of each colour – Lilac and Pewter
- 4x3mm Electroplated Glass Faceted Rondelles – approximately 50 of each colour – Platinum and Multicoloured
- 6mm Vacuum Beads – approximately 31 – Violet
- 5.5cm Memory Wire – approximately 5½ rounds
Tools
Giveaway
We are giving away a $50 Voucher. That’s right, you could win a $50 credit with our store. Watch the video to find out how to win. This competition is open worldwide.
THE COMPETITION IS NOW CLOSED.
Instructions
Watch the video or read the instructions below.
Make a Loop
Cut your memory wire to approximately 5 ½ rounds. You don’t need to be specific here, it’s just so that it makes it more manageable. You can trim it to the correct size later.
Using the round nose pliers, make a P Loop in one end of the wire. Make the loop so that it’s facing towards the centre of the circle.

Round 1
Thread on approximately 47 of the 4mm Lilac Glass Pearls. This should take up exactly one round of the wire. Adjust the number of beads if necessary. Ensure all the beads are pushed right down to the loop.

Round 2
Repeat the process above, this time using the Platinum 4x3mm Electroplated Glass Faceted Rondelles.

Round 3
This time we’re going to thread on approximately 31 of the 6mm Vacuum Beads. Adjust as necessary so that you have one full round of the beads. Push all the beads down.

You can see that the first and last bead butt up against each other.
Round 4
Repeat round 1, this time using the Pewter Pearls.

Round 5
Repeat round 2, this time using the Multicoloured rondelles. At this point you need to hold the end firmly so that the beads don’t spring off. Adjust the number of beads so that beginning of the bracelet and the end are equal.

Make Another Loop
The last thing you need to do is make another loop. If you still have wire left, trim it off to approximately 1cm from the last bead. Make a loop as you did for the beginning of the bracelet.

The bracelet should stack nicely when placed on a flat surface.
Just to make it super easy for you, here’s a diagram of how you thread the beads.