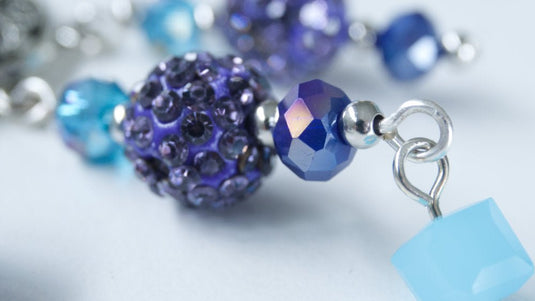
Have you figured out yet that I really like blue? Today’s tutorial was inspired by these beautiful acrylic silver-plated blue beads. Aren’t they just wonderful? I’ve also been wanting to use the large coin beads for a while so this seemed like the perfect opportunity.

Even though this necklace looks quite impressive, it’s actually quite easy to make, once you master making loops. Loops just take practice and if you need help with that you could watch this video.

Materials
To make this blue necklace with the focal bead and dangle, you will need:
- 26mm Aqua Silver Lined Flat Coin Bead x1
- 11.5x11mm Acrylic Plated Beads x9
- 4mm White AB Vacuum Beads x 19
- 8x6mm Aqua Glass Crystal Faceted Rondelle x 8
- 6mm Silver Ball x 17
- 3mm Blue Crystal Glass Bicone x16
- 4mm Aqua Crystal Glass Faceted Round Beads x2
- 5cm Silver Headpins x4
- 20 Gauge Silver German Style Wire
- 18x5mmSilver Magnetic Hematite Clasp x1*
*You could use any clasp for this project.
Tools
Instructions
Watch the video or read the instructions below.
Step 1 – The Focal Dangles
To make the dangles on the focal, thread one of the vacuum beads onto a headpin. Make a loop using the 1-step looper or your round nose pliers. Double check that the loop is closed.
If you haven’t got a 1 step looper and have not made loops before, you can watch this video.
Make two dangles using the white vacuum beads and two using the 4mm aqua faceted round beads.

Step 2 – The Focal
Cut a 9-10cm piece of wire. Make a loop in one end using your 1-step looper. Open the loop and add the dangles that you just made, alternating the colour. Close the loop.

Thread on one of the following beads:
- Coin Bead
- Acrylic Silver Plated Bead
- Silver Bead
- Vacuum Bead
Make a wire wrapped loop at the top of the beads using the round nose pliers. If you have never made a wire wrapped loop before, watch this video.

Step 3 – The Necklace Components
This necklace is made up of two components. The first uses the bicone and crystal rondelles, the second uses the acrylic bead, silver ball and vacuum bead.
Crystal Component
Cut a piece of wire about 6cm long. Using the 1-step looper or round nose pliers, make a loop in one end. Thread on the beads in this order:
- Bicone
- Crystal rondelle
- Bicone
Make a loop in the other end.

The Acrylic Component
Cut a piece of wire about 7cm long. Repeat the process as you did for the Crystal Component except that this time you will thread on the beads in this order:
- Vacuum Bead
- Silver Bead
- Acrylic Silver Plated Bead
- Silver Bead
- Vacuum Bead
Make a loop in the end.

Step 4 – Joining the Components
To make the necklace you need to join two strands of eight of the components you just made. You will use four of each component for each strand.
Open the loop on one end of the Crystal Component and add an Acrylic component. Close the loop. Next, open the loop on the Acrylic Component and add a Crystal Component. Continue until you have four of each component. Repeat for the other side.

Step 5 – Adding the Focal to the Necklace
To add the focal component to the necklace, open the loop on the end Crystal Component. Thread on the wrapped loop of the focal component. Close the loop.

Repeat for the other side, ensuring that you attach both Crystal Components, not the Acrylic one.

Step 6 – Attaching the Clasp
All that’s left to do is attach the clasp. If you’re using one of these magnetic clasps, you don’t need a jump ring, you can just open the loop of the Acrylic Component, pop on the loop of the clasp and close the loop again. Repeat for the other side.

That’s all there is to making this necklace. It takes a while because there are lots of components but it’s well worth it. As I said, it’s not really difficult, the hardest part is the wire wrapped loop, which can take some time to perfect. If you’re having difficulty with wire wrapped loops, you could try using 26 Gauge wire to practice. That might make it easier until you get better at it.


